Installing Apache Directory Studio
Learn how to install Apache Directory Studio and effectively link it with an example database to enhance your understanding and proficiency in managing and manipulating directory services.

Updated at September 11th, 2025
Table of Contents
Date: 4/11/2022
Overview
Adobe Apache Directory Studio is a program used to allow the user to better visualize, edit and configure their existing database. This guide will discuss any steps needed before installation and the installation of the program on to your respective machine.
Java Installation
It is important to make sure you have Java up-to-date and installed on your computer. If not, the program will have no ability to run. A current version of Java can be found here for Mac OS, Windows, etc. for example.
After this is installed, we can continue to installing the main program.
Installing Apache Directory Studio
1. Visit here.
2. Click "Download Apache Directory Studio 2.0.0-M17".
3. Select which operating system to download the program to (Windows, Debian, MacOS, etc.)
4. Open Apache Directory Studio.
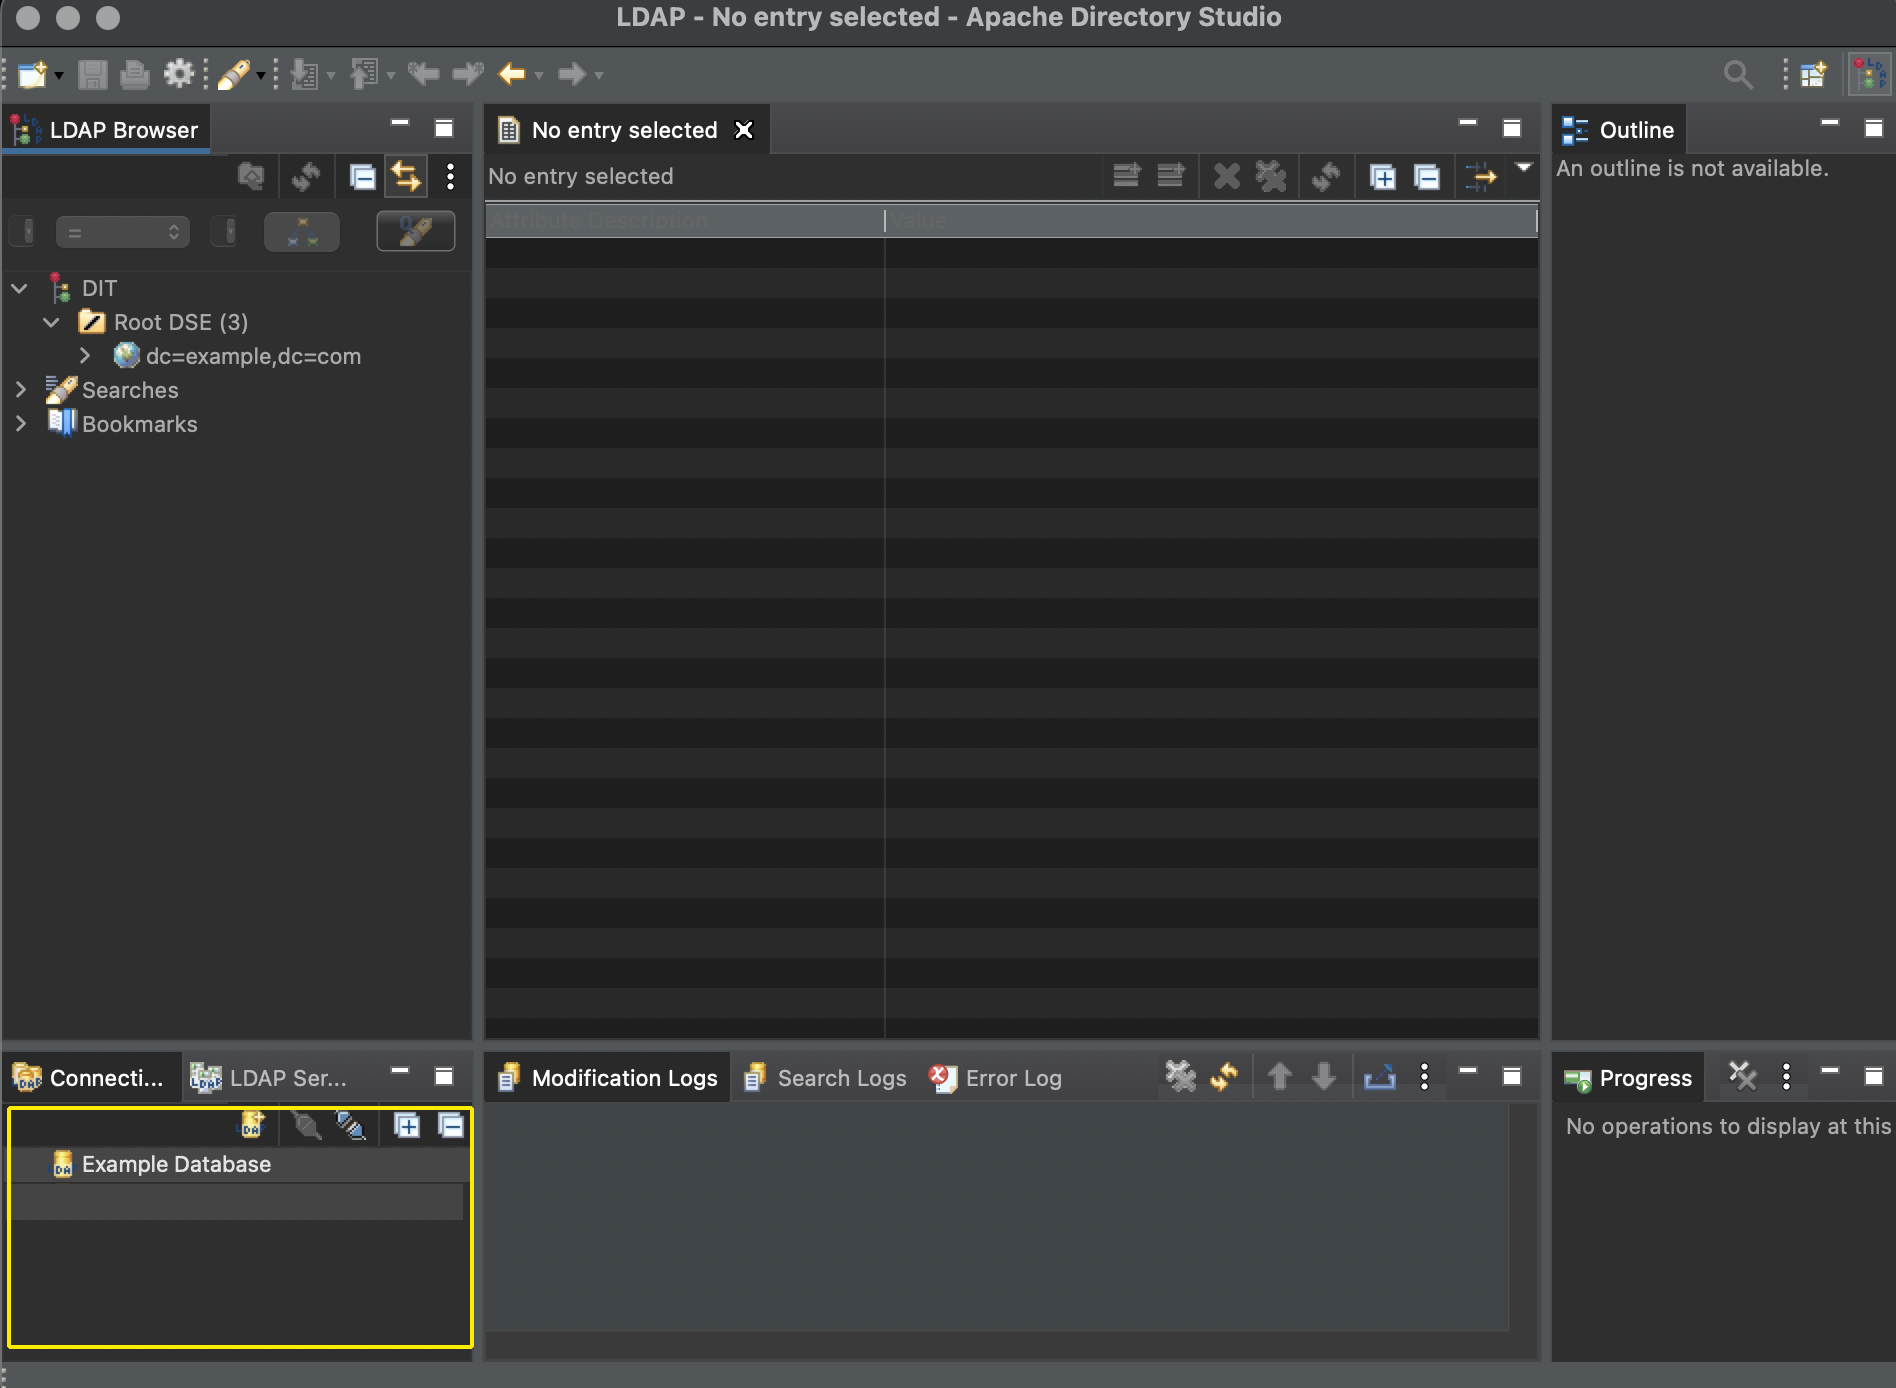
When Apache Directory Studio is opened, the program will bring you to a main home page presenting all of the options to start your use of the program. For this exercise, we will skip the welcome page and continue to the dashboard. A few things to take note of are:
- The furthest-left column will be used to display the tree structure of the database. This section will be crucial in helping to visualize the entries and their structure within your database.
- The middle dashboard will be used to show the current file selected and all attributes associated with that file. We will be able to use this space to edit, delete, and double check any entries we have in our database.
- The bottom-left corner displays all databases you currently have access to, and will allow you to switch between multiple databases if needed.
- The bottom-middle presents the data coming from your database through terminal format. This can be useful to see how it is presented within your files in order to facilitate any edits on errors, searches and/or entries.
Now you are ready to connect a database to the program and visualize the tree structure on a more user-friendly level.
If you don't have the example database installed, click here.
Connecting the Example Database
Before you begin connecting within the Apache Directory Studio, there are a couple pieces of information needed to be found within the terminal. These pieces include:
- The directory path location of the example database
- The IP address of your example database
- The dn of the example database
Make sure to connect to your server before running any commands; all of the work will be done on the remote server. In order to connect to this, simply run:
ssh <name>@server name/IP addressFirst, we will make sure that slapd is running by running the following command:
sudo systemctl start slapdNOTE: This will prompt you to enter the password you established for your connection to your tester
Then, we will check the status of slapd:
sudo systemctl status slapdThis should return data that looks similar to this:
● symas-openldap-server.service - Symas OpenLDAP Server Daemon
     Loaded: loaded (/lib/systemd/system/symas-openldap-server.service;enabled>
     Active: active (running) since Wed 2022-04-06 18:42:13 UTC; 1 day 19h ago
       Docs: man:slapd
             man:slapd-config
             man:slapd-mdb
   Main PID: 85842 (slapd)
      Tasks: 4 (limit: 1132)
     Memory: 16.9M
        CPU: 115ms
     CGroup: /system.slice/symas-openldap-server.service
             └─85842 /opt/symas/lib/slapd -d 0 -h ldap:/// ldapi:/// -F/opt/sy>
[Ctrl]-[c] to break out of the display.
Now that slapd is running, we will be able to execute the example database by following this path:
/opt/symas/share/symas/exampledb.shRun the program:
sudo ./exampledb.shThis will prompt you to choose between slapd.conf and cn=config to proceed. From the quickstart, the slapd.ldif is configured using cn=config, so for this step we will choose 2.
Then this will ask to delete the contents of the existing database on the server. Since we were able to make a backup of the quickstart database, we will say yes and it will proceed to delete anything not in agreeance.
Finally, this will ask to start the search, and we can say yes to this as well. This will return multiple search responses if performed correctly
Connecting the Example Database to Apache Directory Studio
Since we will be adding a new directory to the list of directories you will have access to, we will pay our attention to the bottom-left corner where databases will be listed. Within this box, there are five buttons that allow us to control our databases.
If you roll your cursor over any of these five icons and hover, you can see what they do. Three important functions are:
- New Connection: Creates a new connection between Apache Directory Studio and an established database configuration.
- Open Connection: Connects to an established new connection and allows Apache Directory Studio to visualize and edit the entries.
- Close Connection: Cease the connection with the database, but remain an option within the program.
We will click on “New Connection” to connect our database to the program. This will bring up a prompted menu that step-by-step will ask us for data from our database to help connect.
1. Connection Name: choose a title for your connected database that will be displayed within the bottom-left menu
2. Hostname: Retrieve your IP address associated with your database configuration and enter it in here.
3. Port: This should be set to port 389, which is specifically used for LDAP directories according to internet protocol
4. Connection timeout(s): This will be set to 30 and for the time being, we will keep it set at 30.
5. Encryption method: If you have a firewall set up on your database, this is a step that will have to be accounted for; otherwise, select “No encryption”.
6. Click ‘Check Network Parameter” to ensure you have the proper data before going further. This should return “The connection was established successfully” with no error.
7. Click Next
This will bring you to the Authentication Screen Menu
1. Make sure the Authentication Method is set to “Simple Authentication”
2. Authentication Parameters should reflect what your dn= in your example.db. This can be found within /opt/symas/share/symas/exampledb.sh (dc=example,dc=com)
3. Bind Password: the example password is set to secret
4. Click next
This will take you to the Browser Options Menu
1. Make sure to set count limits and time limits to 0
2. Set the follow referrals automatically
3. Set the fetch subentries while browsing
4. Set the fetch operational attributes while browsing.
If done correctly, this should show dc=example,dc=com as a tree.
Conclusion
Now the Example Database should be connected to the Apache Directory Studio and present multiple branches of the tree on the left most column. These can be edited, removed, and viewed within the space and will reflect back upon the original database. If more databases should need to be configured, follow the guide above and substitute any data pertaining to the new database.
In order to connect and disconnect between multiple databases, the "Open Connection" and "Close Connection buttons can be used in the bottom left corner of the program. This allows the user to connect to multiple databases within the single space and jump between as needed.